

This tutorial was written by Monti in 2003 and updated on December 10th 2006. You may print out this tutorial for your own personal use, but please do not copy it in any way to put online, pass out or rewrite without my permission or worse yet attempt to claim as your own.
This was written for psp 9 but will work in other versions.
For this tutorial you will need
Paint Shop Pro
The Tube you wish to Colorize
I am using a tube by Barbara Jensen for the purposes of this tutorial.
If you wish to use her work please visit www.barbarajensentubes.com to purchase a license.
Open the tube you want to colourize in psp.
Press Shift and D to make a duplicate image of the tube and close the original.
Step 1:
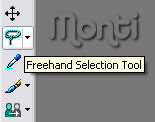
Select your lasso tool in psp. Set Feather to 1 and make sure antialias is checked.
Now what you need to do is draw around the area that you want to colourize, so that it is surrounded in marching ants. Try and stay as close to the edge as possible but don't worry if you get a bit of skin etc. in the selections. I will show you how to get rid of that later.
It should look similar to this when you have finished.
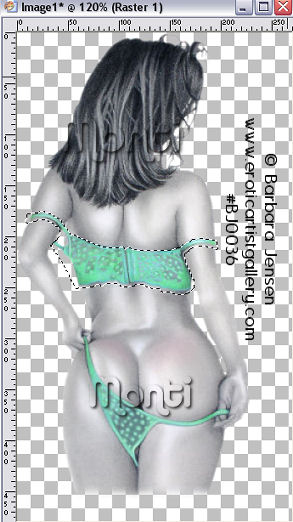
Now you need to go to selections, promote to layer. Rename according to the part you promoted.
Deselect.
NOTE: Do ALL areas APART from the skin area.
Step 2:
Hide your bottom layer, then click on the promoted layer to activate it.
Now zoom in on the image so that you can see any areas of skin etc that shouldn't be there and change your feather on the lasoo tool to 0.
Zoom in and select the areas that shouldn't be there, then hit delete on your keyboard.
See screen shots below.
Before

After

Repeat this until you have all the areas you want to colourize promoted to seperate layers and have them cleaned up.
TIP: Rename the layers so you know what they are. eg skin, hair, clothes etc. (See below). Remember to do the whites of the eyes too.
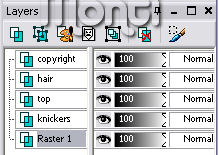
Once you have all the layers promoted you can begin colourizing.
Step 3:
Now on your tool bar go to Adjust - Hue and Saturation - Colorize and play around with your hue and saturation until you get the colour you want.
NOTE: The hue changes the colour and the saturation changes the depth and intensity of the colour.
Play around with it, and if you can't quite get the colour you want try adjusting the brightness and the contrast first.
Colourize the rest of the layers.
Step 4:
Once all the other layers are coloured activate the original layer (bottom).
Go to Selections - Select all - Float - Defloat.
Add a new Raster layer and fill with a skin tone of your choice, I used #D2AC90.
DO NOT deselect.
Change the skin tone layer to Colour Legacy (in your layer palette) and go to Selections - Modify - Feather by 2 - Selections - Invert and press delete on your keyboard.
Deselect.
NOTE: It is a good idea to save the tube in layered format should you ever want to change the colours again in the future.
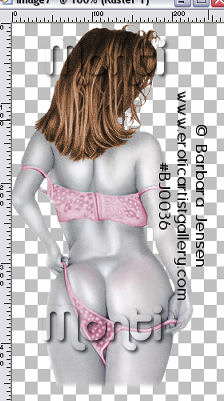
This is what mine looks like when finished.

No comments:
Post a Comment